Roof
roof pitch
Drempel
Flat roof
Upper floor slab
Solid ceiling
timber-beamed ceiling
Nail binder
Attic conversion
External wall
Façade
Partition joint in a house
cellar wall
Ground floor
cellar ceiling
Stairway to the cellar
Solid ceiling
Cap ceiling
Timber joist floor/cavity
Special components
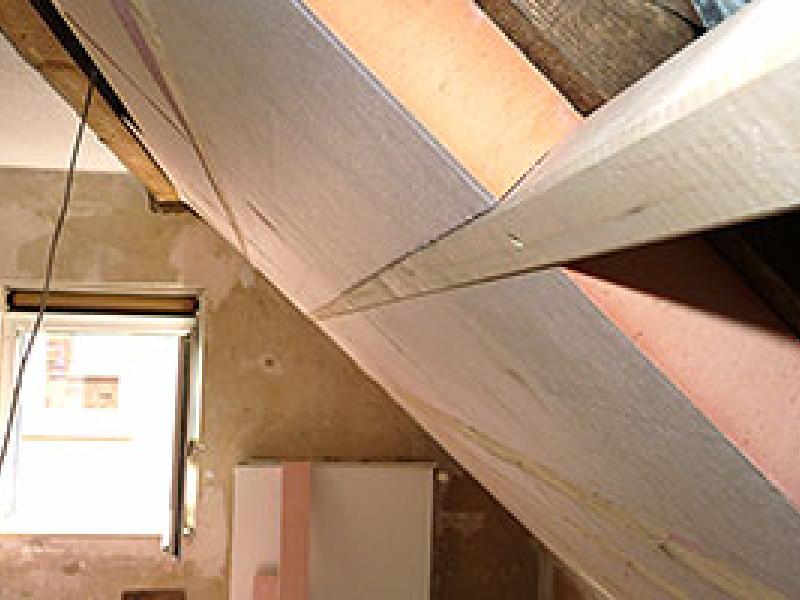
Uninsulated sloping ceilings are characterised by cold surfaces. Exposed wooden beams lend a rustic look, whilst any damp patches may indicate condensation. Rooms under sloping ceilings are often uncomfortably cold and very hot in summer. Heat loss is high, as are heating costs and CO₂ emissions.
Particularly in large cities, where living space is scarce and expensive, many unused attics (lofts) are being converted. The sloping ceilings must be insulated in order to create comfortable and heatable living spaces.
A roof underlay (water-bearing sub-roof) is usually not present. However, one must be installed, as otherwise any condensation (beneath the roof cladding), drifting snow or rainwater ingress (e.g. through broken or wind-displaced roof tiles or joints) could penetrate the insulation. As a result, the dampened insulation would no longer be effective and the rafters could be damaged by the moisture. In short: too much moisture penetrating into the interior would cause mould damage.
A water-diverting underlay is therefore essential!
Please note!
If the loft is not used as living space (= not heated), insulating the loft is pointless, as it is far too expensive and inefficient. In this case, only the sloping roof of the heated living area and the ceiling of the living area should be insulated. See
However, if the loft is to be converted and used as living space, proceed as follows:
First, the cladding on the sloping roof and any existing glass wool insulation are removed. A wooden batten (4 cm x 6 cm) is installed vertically in the centre between the rafters. Next, a roof underlay membrane (available from roofing suppliers) is cut to size (clear distance between the rafters plus 20 cm). This membrane is fitted tautly beneath the roof battens – auxiliary battens on the sides make it easier to fit the membrane precisely beneath the existing roof battens. The roof batten installed previously ensures that the underlay forms a very gently sloping ‘V’; any water that might run under the roof tiles would then collect at the lowest point of this ‘V’. The underlay should be installed so that water is channelled away over the top of the masonry.
The existing rafters are usually 14 to 16 cm high. The rafter cavity would not be sufficient for effective insulation. To create a sufficiently deep insulation cavity, so-called ‘rafter expanders’ are fitted to the sides of the rafters. These consist of a vertical plywood board and a horizontal wooden batten. These expanders allow for thick layers of insulation to be installed. A total insulation thickness of at least 30 cm is recommended.
A vapour barrier membrane is installed beneath the rafter expanders; care must be taken to ensure an airtight installation. As the gypsum boards, which are usually the final layer, must not be screwed directly onto the rafter expanders (otherwise they would crack and form gaps), a ‘gypsum battens’ is screwed horizontally onto the vapour barrier membrane. These battens measure 4 cm x 6 cm.
The resulting cavity between the rafters/rafter expanders at the sides, the V-shaped underlay beneath the roof cladding and the vapour barrier on the inside is extremely irregular in shape, making it difficult to install insulation using mats. Insulation boards of any kind are completely unsuitable!
Blown-in insulation using fibrous materials provides the solution here. These products also offer the best value for money; they are quick to install, leave no gaps, there is no waste, and even in challenging areas such as dormer connections or the ridge purlin area, a joint-free installation is easily achievable. Alternatively, soft mat-type insulation materials can be cut to size and inserted between the rafters.
As the cavity between the individual ‘plaster battens’ is present anyway, it is advisable to insulate this further with a high-performance insulation material such as polyurethane (aluminium-laminated, WLS 023) or phenolic resin WLS 021. Electrical cables for lights etc. can also be routed within the ‘plaster battens layer’.
The total thickness of the insulation should be at least 30 cm.


All the benefits at a glance
Improved thermal insulation: The thermal insulation achieves a minimum U-value of 0.14 W/m²K (watts per square metre per kelvin) or better.
Lower heating costs: The newly built loft flat consumes little heating energy and offers excellent thermal insulation in summer. Very little heat penetrates the living space through the roof, making it very comfortable in both summer and winter.
Further advantages:
- Draughts are eliminated
- Comfort is enhanced due to higher temperatures on the inner surfaces of the external walls
- Mould problems are eliminated
- Heating costs fall noticeably
- Summer heat protection is significantly improved
- CO₂ emissions are reduced
Costs/Cost-effectiveness: The work can largely be carried out by the homeowner. If this is not possible, enquire with a firm specialising in drywall construction about current prices. The blow-in process is carried out by specially trained contractors, and the costs can be reduced with your assistance.
Subsidy: This measure is subsidised at 15 per cent under the Federal Subsidy Scheme for Efficient Buildings (BEG) by the Federal Office for Economic Affairs and Export Control (BAFA). An energy adviser is required for this. If the energy adviser also draws up a so-called individual renovation roadmap (iSFP), the grant increases to 20 per cent. If you carry out the work yourself, only the cost of materials is eligible for the grant, provided it exceeds €2,000. An energy adviser must confirm that the work has been carried out to a professional standard.
Alternatively, a 20 per cent subsidy is available through a reduction in income tax. No application is required for this, but the subsidy is spread over a period of three years. Work carried out by the homeowner is not eligible for this tax relief.
Can I install the insulation myself? A large part of the work can be carried out by yourself; only the blow-in process is carried out by specialist firms. Assistance is possible and is welcome.
Insulation materials: In the rafter cavity: blow-in insulation materials such as cellulose, Neptun ball fibres, rock wool fibres, wood fibres or mineral fibres – alternatively, all types of mat insulation
In the ‘plaster battens layer’: polyurethane (aluminium-laminated, WLS 023) or phenolic resin boards (WLS 021)