Roof
roof pitch
Drempel
Flat roof
Upper floor slab
Solid ceiling
timber-beamed ceiling
Nail binder
Attic conversion
External wall
Façade
Partition joint in a house
cellar wall
Ground floor
cellar ceiling
Stairway to the cellar
Solid ceiling
Cap ceiling
Timber joist floor/cavity
Special components
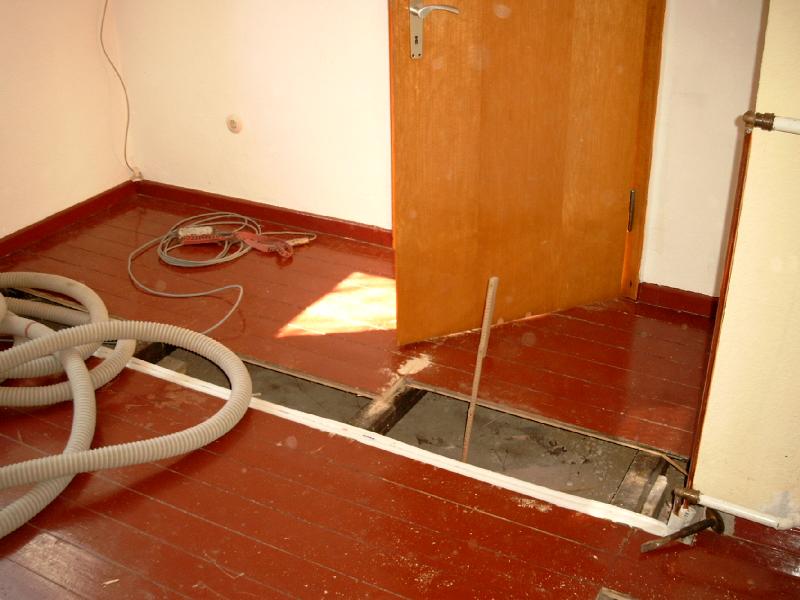
In older houses, you often find a wooden plank floor on the ground floor; this is frequently painted brown or red (commonly known as ‘ox’s blood’). For structural reasons, the wooden floorboards are nailed from above onto a layer of joists at least 10 cm high. This can be seen from above due to the parallel rows of nails. Sometimes this layer of joists contains ash, slag or clay, but often it contains nothing at all.
How can I find out if my floor has a hollow layer?
(Drill a small hole in the floor in a concealed spot and use a stiff wire to check whether there is a cavity.)
- Preparation and gaining access: Check the condition of the timber joists and ensure that you have safe access to the cavity beneath them.
- The blow-in insulation contractor creates a blow-in opening (20 mm in diameter) in each compartment from above, through which the cavity can be quickly filled with polystyrene beads or SLS20 and thus insulated.
If you wish to use a fibrous insulation material (cellulose, wood fibre, glass wool, rock wool), at least two floorboards must be removed from the edge of each room. The blow-in hoses are inserted as far as possible into the cavities through the resulting opening, and the cavities are then filled using the blow-in method.
If it is not desirable or possible to access the cavities from above (from the ground-floor rooms) – for example, because there is a high-quality wooden floor or because it has recently been renovated – it is also possible to blow in free-flowing granules from the cellar ceiling. However, as this is more labour-intensive, it incurs higher costs. Fibrous insulation materials cannot be installed in this way. - Finishing work: The blow-in openings are neatly sealed from above. Drilled holes can be sealed with suitable wooden plugs (available from specialist timber suppliers).
- Tip: Old floorboards (often varnished brown or red) can be sanded down and oiled or waxed after the insulation work is complete. This will give you a beautiful wooden floor ‘with a history’.
As thick as the joists are high.


All the benefits at a glance
Improved thermal insulation: Whilst the U-value of the floor is 1.7 W/m²K at best, it can be reduced to as low as 0.25 W/m²K (depending on the thickness of the cavity)
Lower heating costs: Heating costs can be reduced by around 10 per cent by insulating the timber joist floor with blow-in insulation.
Further benefits:
- Improved comfort: Warmer floors and a more pleasant room temperature.
- Longer service life: Protects timber from temperature fluctuations.
- Increased property value: Attractive energy efficiency.
- Environmentally friendly: Lower CO₂ emissions.
- Quick installation: Efficient blow-in method.
- No loss of space: Invisible insulation without taking up any room space.
Financial support: If a U-value of 0.25 W/m²K is achieved, this measure may be eligible for up to 20 per cent funding.
Can I install the insulation myself? No, you need blow-in equipment. However, costs can be reduced by helping out (setting up the site, feeding the insulation material into the blow-in machine, cleaning up and dismantling the site). Ask a specialist contractor!
Insulation materials: cellulose, wood fibres (blown in through openings in the floorboards), expanded polystyrene (EPS), SLS20 (blown in through 20 mm diameter boreholes drilled from above or below)


